This activity was completed so that we would understand how to navigate when we do have some equipment that is a bit more up to date. Whereas in the previous activity we learned how to navigate using only the most basic technology, this activity involved using a GPS device to navigate between preset points on UW-Eau Claire's Priory property. This being said, it was a much more simple activity, because all that we had to do was navigate to the given UTM coordinates as the GPS displayed our current coordinates, as opposed to drawing bearing lines trying to stay on the set bearing.
Methodology
Much like the previous activity, we were split into teams to navigate to different points within the University's Priory property. Each team was assigned to a new course for this activity, so that we would be navigating to unfamiliar points. Zach, Laurel, and I were assigned to Course 3, and we would be doing the course in regular order instead of backwards like we had previously. Again, we were given a sheet with all the coordinates on it (Figure 1), but this time the only other materials that we needed was our GPS unit (Figure 2). Once we found our starting point, we simply had to navigate to match the coordinates on our GPS with the corresponding point coordinate.
 |
| Figure 1: The coordinate sheet. Our team did course 3 (Points 1B through 6B) |
 |
| Figure 2: The GPS unit that was used for navigation |
 |
| Figure 3: Zach and I pinpoint the coordinates of a point on the course. |
Results
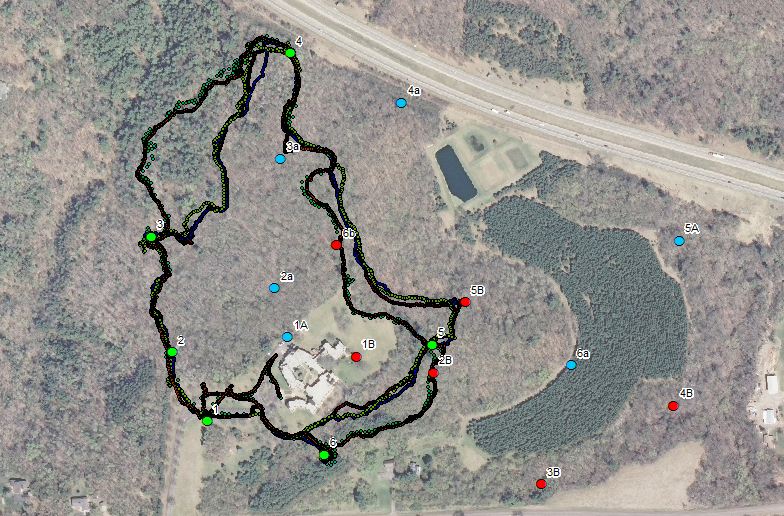
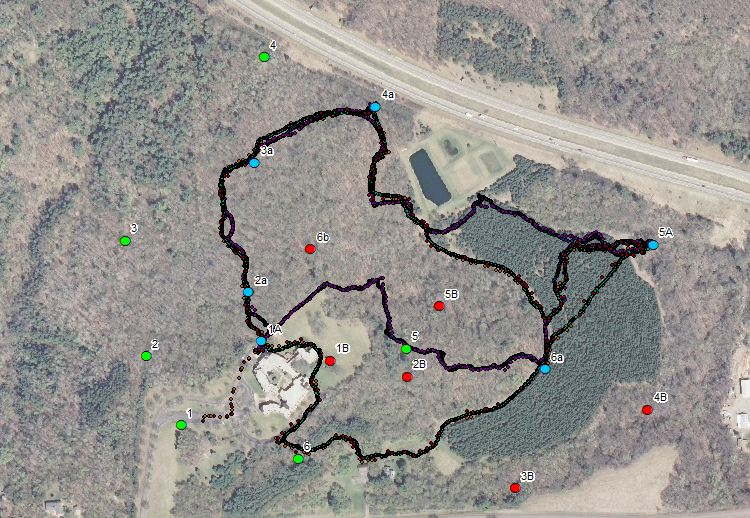
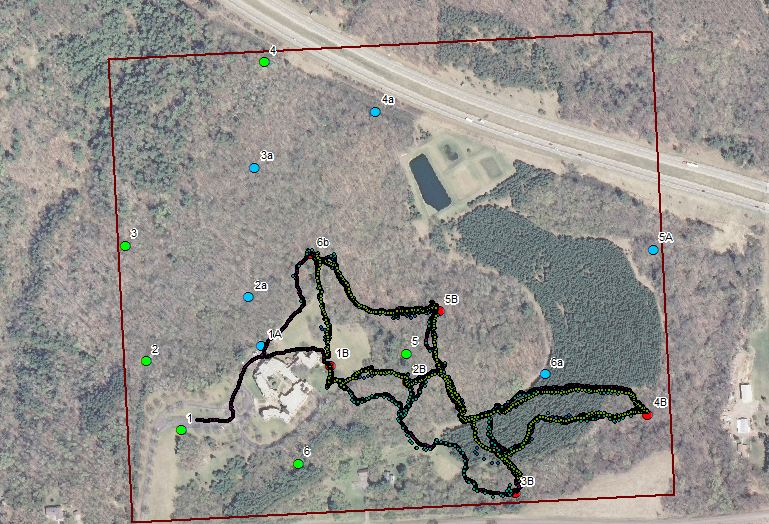
Throughout this exercise, our GPS units recorded tracklogs of our navigation progress. By importing these into ArcMap, we were able to visualize our navigation throughout the course and compare our results to the other team that navigated the same course as us. This was also pretty neat, because it gives us all a picture of how much land we covered as we completed the activity. The four images below display the tracklogs of our GPS units. There is an image for each course, and a single image with all of the tracklogs on it.
 |
| Figure 4: Tracklogs of the team members who completed Course 1. |
 |
| Figure 5: Tracklogs of the team members who completed Course 2. |
 |
| Figure 6: Tracklogs of the team members who completed Course 3. |
 |
| Figure 7: Tracklogs of all the students in the class. |
Discussion
This activity was quite educational and interesting. It was nice to get to explore the winter landscape once more and discover how to navigate with nothing but a GPS unit. As the figures above show, the class covered a lot of terrain, so it was quite an adventure.
No comments:
Post a Comment